

How To Create Executable Jar File In Eclipse
- Details
- Written by
- Last Updated on 07 August 2019 | Print Email
A JAR (Java Archive) file is a ZIP format file that bundles Java classes into a single unit. There are two types of JAR file in Java:
-
- Library JAR (normal JAR) files: JARs which are reusable libraries.
- Executable JAR files: JARs which can be executed as a standalone Java applications. A main class must be specified when creating this kind of JAR file.
Create a normal JAR file:
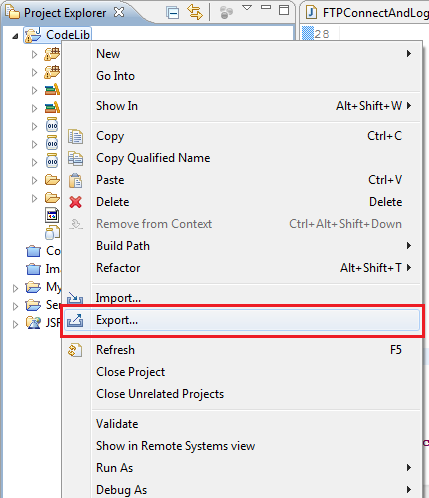
Right click on project name in Project Explorer view, select Export… (or select Export… from File menu):
In the dialog Export, select Java > JAR file:
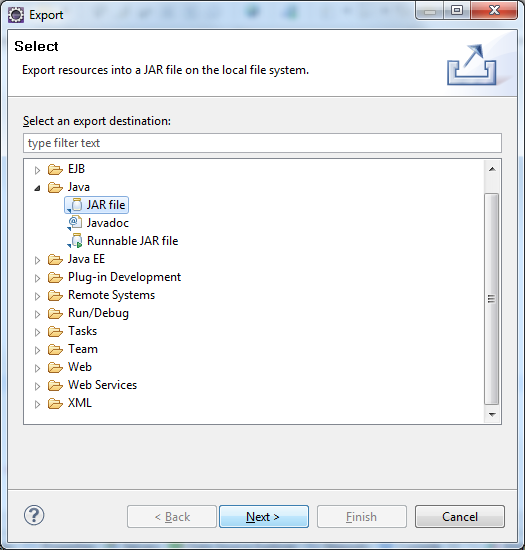
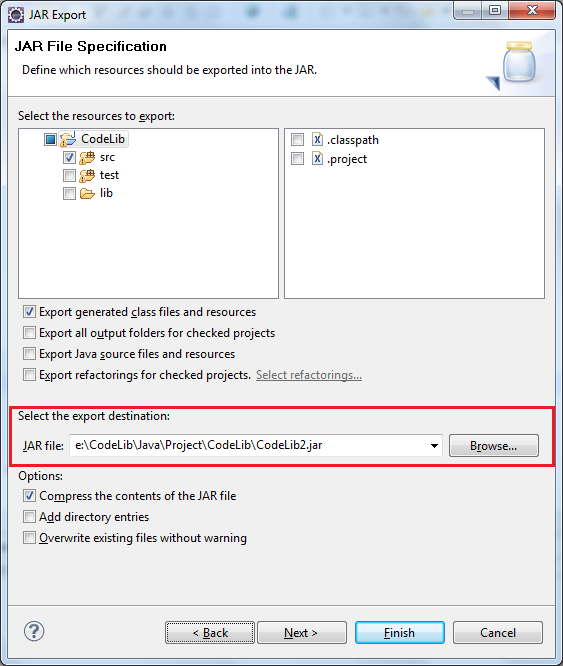
Click Next. In the screen JAR File Specification:
-
- Under section Select resources to export, uncheck the project node, and select src directory (we can select other directories if needed, but the src directory must be selected).
- Under section Select export destination, specify path of the JAR file will be exported.
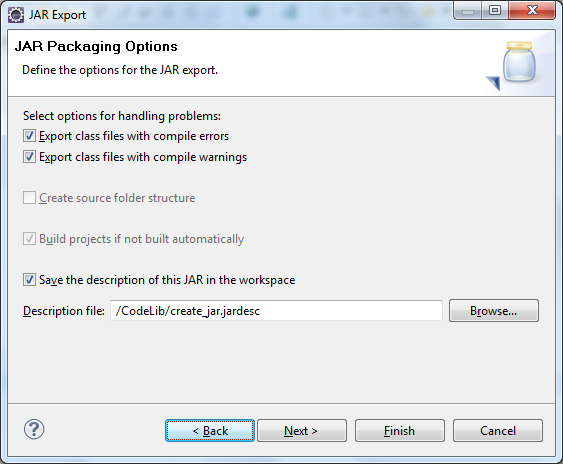
Click Next. In the next screen, we can select an option to save export information so that we can re-create the JAR file later without redoing the previous steps:
-
- Check the option "Save the description of this JAR in the workspace".
- Click Browsebutton to specify path of the description file.
Click Finish. All class files of the project are exported to a JAR file and a JAR description file is created, under project's root directory:
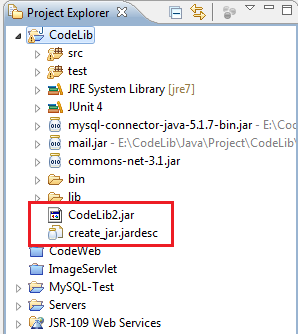
Note that the file ends with .jardesc is the JAR description file which stores the information we have specified in the wizard. And we can use it as a shortcut whenever we want to re-export the JAR file.
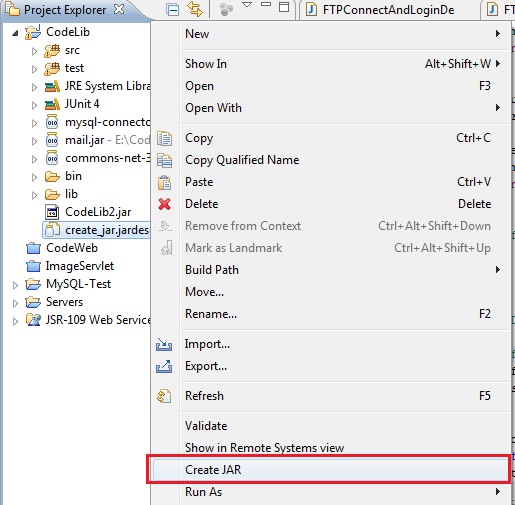
Right click on the .jardesc file, select Create JAR:
Create an executable JAR file:
Creating an executable JAR file is same as creating a normal JAR file, except it requires to specify a main class. In the screen JAR Packaging Options, click Next will take us to the screen JAR Manifest Specification:

In this screen we can:
-
- Specify the manifest: Select the option Generate the manifest file.
- Seal content of the JAR file: select the option Seal JAR.
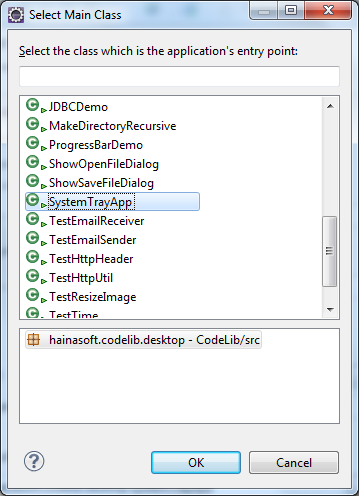
- Select the main class that acts as an entry point to the application: Click Browse button next to the text field Main Class. The dialog Select Main Class displays all classes which have main method. Select the desired class, then click OK:
Click Finish, the executable JAR file is created.
Other Eclipse Tutorials:
- How to use Eclipse IDE for Java EE Developers
- How to create, build and run a Java Hello World program with Eclipse
- How to generate Javadoc in Eclipse
- How to create WAR file for Java web application in Eclipse
- How to create Ant build file for existing Java project in Eclipse
- How to pass arguments when running a Java program in Eclipse
- How to create Java web project with Maven in Eclipse
- 25 Eclipse Shortcut Keys for Code Editing
- How to Add Copyright License Header for Java Source Files in Eclipse
About the Author:
 Nam Ha Minh is certified Java programmer (SCJP and SCWCD). He started programming with Java in the time of Java 1.4 and has been falling in love with Java since then. Make friend with him on Facebook and watch his Java videos you YouTube.
Add comment
How To Create Executable Jar File In Eclipse
Source: https://mail.codejava.net/ides/eclipse/how-to-create-jar-file-in-eclipse
Posted by: salasgrandise.blogspot.com
0 Response to "How To Create Executable Jar File In Eclipse"
Post a Comment